
Toyota Venza: Parts Location
PARTS LOCATION
ILLUSTRATION
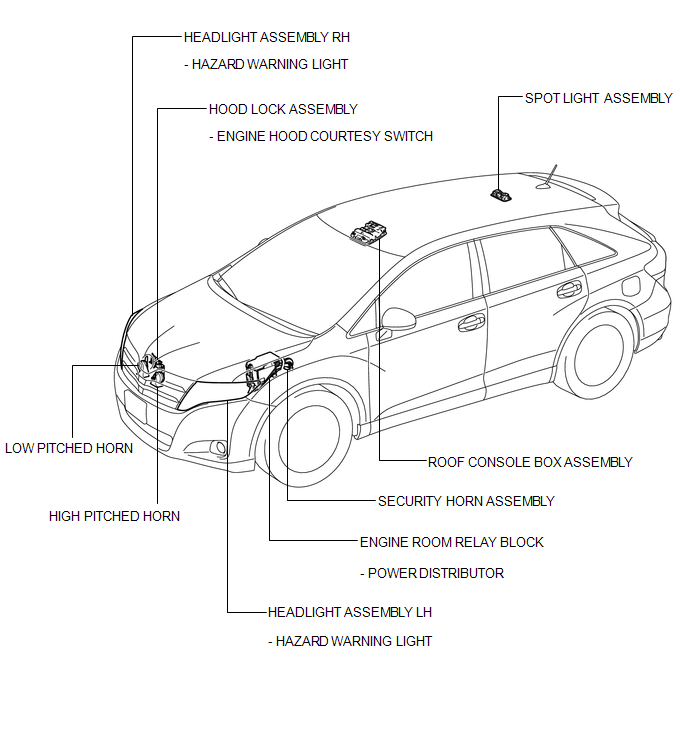
ILLUSTRATION
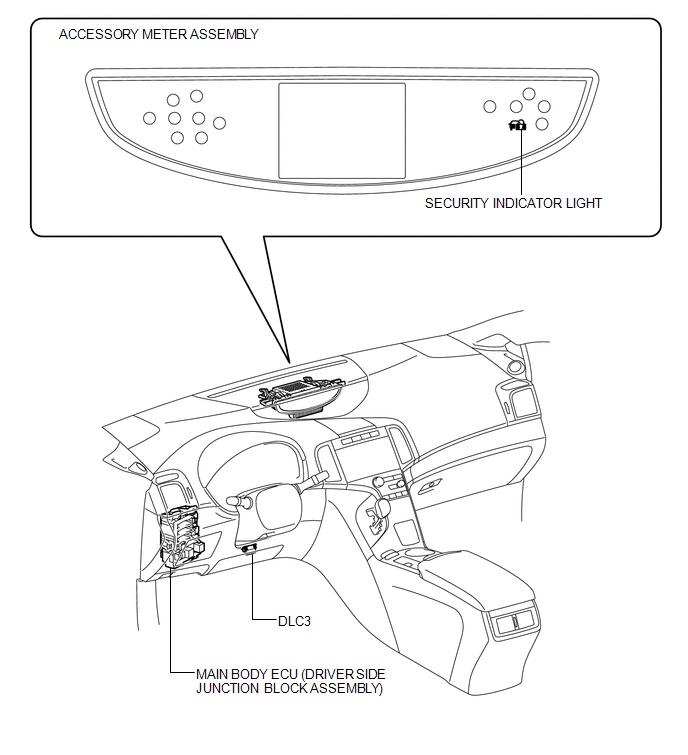
ILLUSTRATION
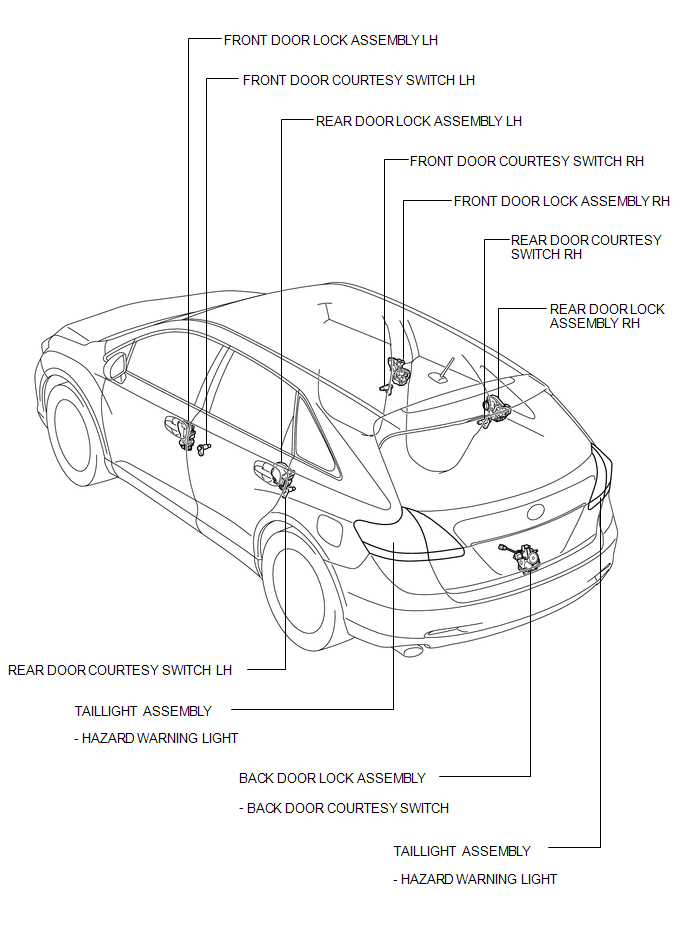

 Precaution
PRECAUTION
1. NOTICE FOR INITIALIZATION
CAUTION:
When disconnecting the cable from the negative (-) battery terminal, initialize
the following system after the cable is reconnected.
S ...
Other materials about Toyota Venza:
Diagnostic Trouble Code Chart
DIAGNOSTIC TROUBLE CODE CHART
If a trouble code is displayed during the DTC check, inspect the trouble areas
listed for that code. For details of the code, refer to the ''See page'' below.
Front Power Seat Control System (w/ Memory)
...
Disassembly
DISASSEMBLY
PROCEDURE
1. REMOVE TAIL AND STOP LIGHT BULB
(a) Turn the tail and stop light bulb and the rear combination light
socket and wire in the direction indicated by the arrow shown in the illustration,
and remove them as a unit.
...
Installation
INSTALLATION
PROCEDURE
1. INSTALL REAR SEAT OUTER BELT ASSEMBLY
(a) Engage the 2 guides.
(b) Install the rear seat outer belt assembly with the 2 bolts.
Torque:
Bolt <A> :
7.5 N·m {77 kg ...

0.1296