Toyota Venza: Disassembly
DISASSEMBLY
PROCEDURE
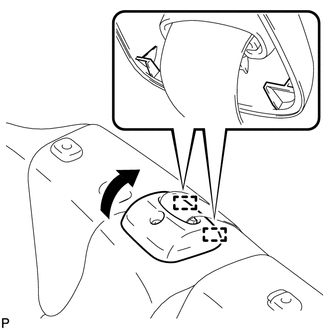
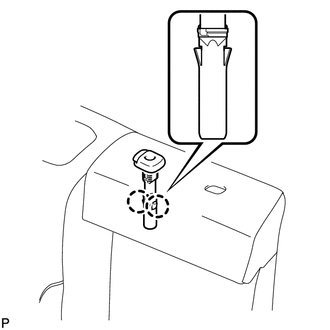
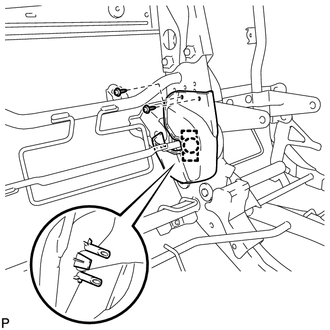
1. REMOVE SEAT ADJUSTER COVER CAP RH
|
(a) Using a screwdriver wrapped with protective tape, disengage the 3 claws and remove the seat adjuster cover cap RH. Text in Illustration
|
|

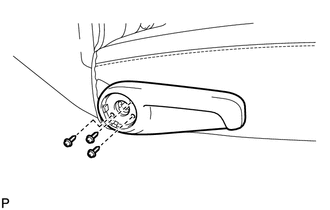
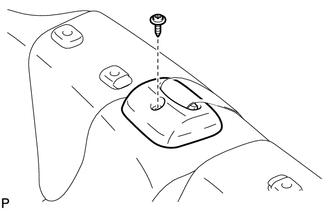
2. REMOVE REAR SEAT RECLINING RELEASE LEVER RH
|
(a) Remove the 3 screws and remove the rear seat reclining release lever RH. |
|
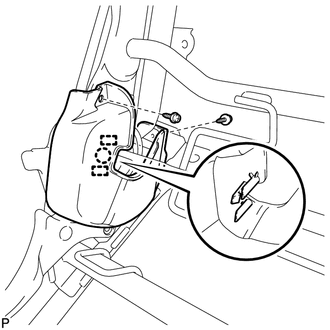
3. REMOVE REAR SEAT RECLINING COVER RH
|
(a) Remove the 2 screws. |
|
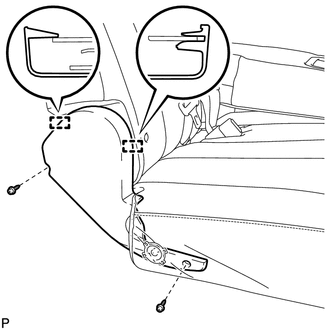
(b) Disengage the 2 guides and remove the rear seat reclining cover RH.
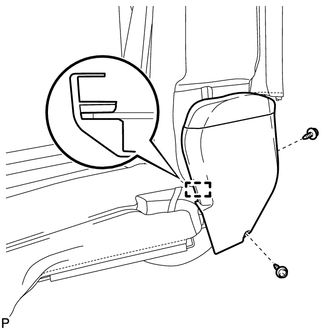
4. REMOVE CENTER SEAT HINGE COVER RH
|
(a) Remove the 2 screws. |
|
(b) Disengage the guide and remove the center seat hinge cover RH as shown in the illustration.
5. REMOVE REAR SEAT INNER RECLINING COVER RH
|
(a) Remove the 2 screws. |
|
(b) Disengage the guide and remove the rear seat inner reclining cover RH.
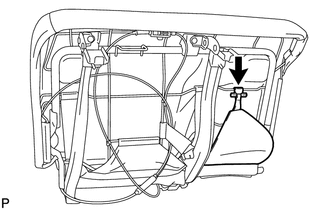
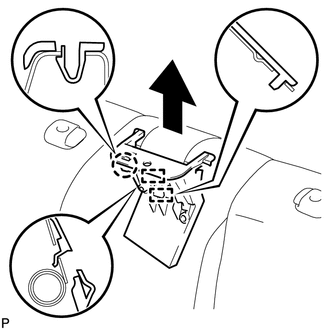
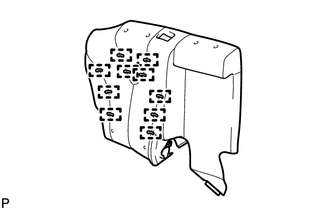
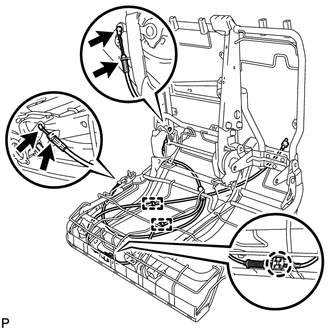
6. REMOVE REAR SEAT CUSHION COVER WITH PAD
|
(a) Remove the hook. |
|
|
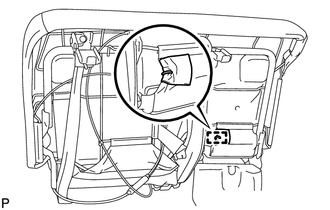
(b) Disengage the hog ring. |
|
|
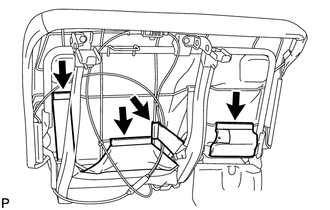
(c) Disengage the 4 hooks. |
|
|
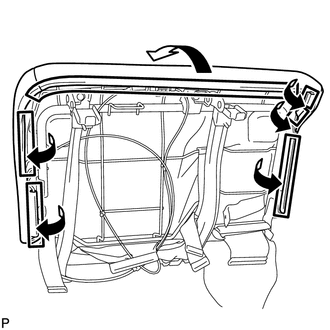
(d) Disengage each hook and remove the rear seat cushion cover with pad as shown in the illustration. |
|
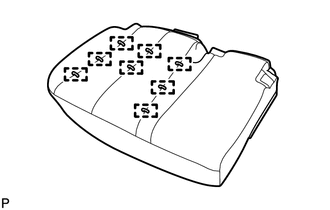
7. REMOVE SEPARATE TYPE REAR SEAT CUSHION COVER
|
(a) Disengage the 8 hog rings and remove the separate type rear seat cushion cover. |
|
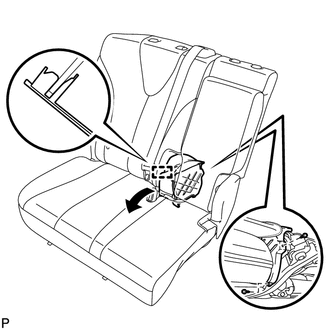
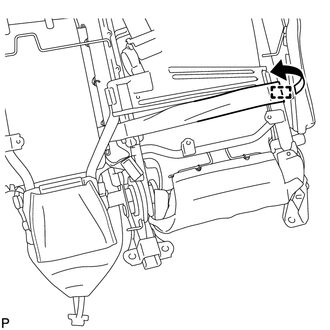
8. REMOVE REAR SEAT INNER BELT ASSEMBLY RH
.gif)
9. DISCONNECT REAR CENTER SEAT OUTER BELT ASSEMBLY
10. REMOVE REAR SEATBACK BOARD RH
|
(a) Disengage the 20 claws. |
|
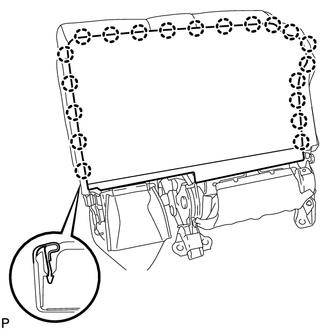
|
(b) Disengage the 4 clips and 3 guides, and remove the rear seatback board RH as shown in the illustration. |
|
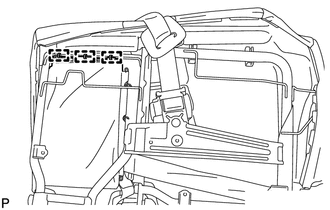
11. REMOVE REAR SEAT SHOULDER BELT COVER
|
(a) Remove the screw. |
|
|
(b) Disengage the 2 guides and disconnect the rear seatback upper lock bezel as shown in the illustration. |
|
|
(c) Disengage the claw and 2 guides, and remove the rear seat shoulder belt cover as shown in the illustration. |
|
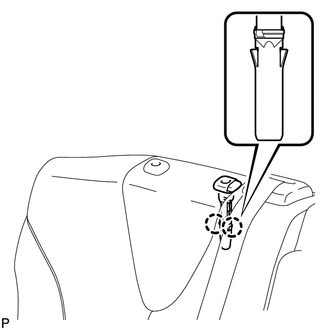
12. REMOVE REAR SEAT HEADREST SUPPORT LH
|
(a) Disengage the 2 claws and remove the rear seat headrest support LH. |
|
13. REMOVE REAR SEAT HEADREST SUPPORT RH
|
(a) Disengage the 2 claws and remove the rear seat headrest support RH. |
|

14. REMOVE REAR SEAT CENTER HEADREST SUPPORT LH
|
(a) Disengage the 2 claws and remove the rear seat center headrest support LH. |
|
15. REMOVE REAR SEAT CENTER HEADREST SUPPORT RH
|
(a) Disengage the 2 claws and remove the rear seat center headrest support RH. |
|
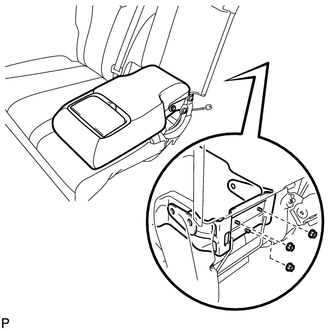
16. REMOVE REAR SEAT CENTER ARMREST ASSEMBLY
|
(a) Disengage the hook. |
|

|
(b) Remove the 3 nuts and the rear seat center armrest assembly. |
|
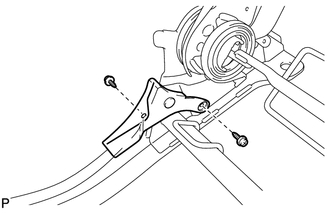
17. REMOVE REAR SEATBACK HINGE LH
|
(a) Remove the 2 bolts, 2 bushes and the rear seatback hinge LH. |
|
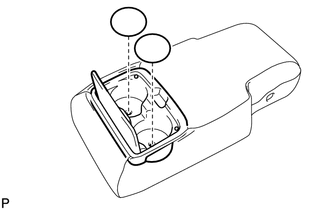
18. REMOVE CUP HOLDER HOLE COVER
|
(a) Remove the 2 cup holder hole covers. |
|
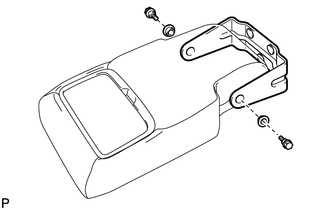
19. REMOVE CUP HOLDER
|
(a) Remove the 2 screws and the cup holder. |
|

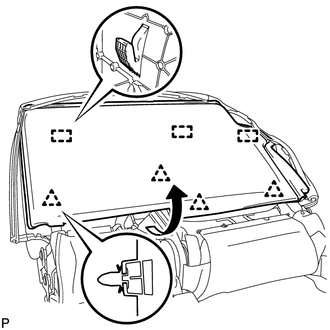
20. REMOVE REAR SEATBACK COVER WITH PAD
|
(a) Disengage the hook as shown in the illustration. |
|
|
(b) Disengage the 2 hog rings. |
|
|
(c) Remove the 3 hog rings and the rear seatback cover with pad. |
|
21. REMOVE SEPARATE TYPE REAR SEATBACK COVER
|
(a) Disengage the 10 hog rings and remove the separate type rear seatback cover. |
|
22. REMOVE REAR CENTER SEAT OUTER BELT ASSEMBLY
23. REMOVE RECLINING ADJUSTER INSIDE COVER LH
|
(a) Remove the 2 screws. |
|
(b) Disengage the claw and 2 guides, and remove the reclining adjuster inside cover LH.
24. REMOVE RECLINING ADJUSTER INSIDE COVER RH
|
(a) Remove the 2 screws. |
|
(b) Disengage the claw and 2 guides, and remove the reclining adjuster inside cover RH.
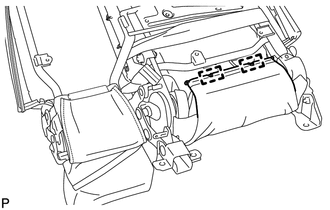
25. REMOVE REAR SEAT RECLINING CONTROL CABLE SUB-ASSEMBLY
|
(a) Disengage the 4 control cable clamps and claw as shown in the illustration. |
|
(b) Remove the 2 clamps and the rear seat reclining control cable sub-assembly.
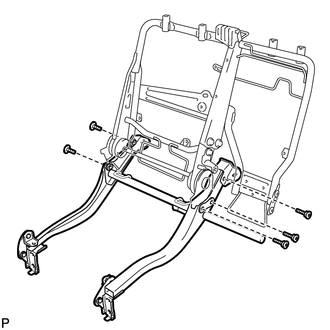
26. REMOVE REAR SEAT CUSHION FRAME SUB-ASSEMBLY RH
|
(a) Remove the 2 bolts. |
|
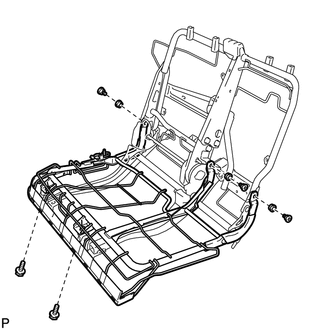
(b) Using a T45 "TORX" socket, remove the 3 "TORX" bolts, 3 bushes, and the rear seat cushion frame sub-assembly RH.
27. REMOVE REAR SEAT LEG SIDE COVER LH
|
(a) Remove the 2 screws and the rear seat leg side cover LH. |
|
28. REMOVE REAR SEAT LEG SIDE COVER RH
|
(a) Remove the 2 screws and the rear seat leg side cover RH. |
|
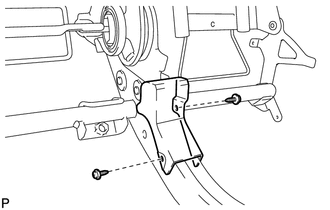
29. REMOVE REAR CENTER SEATBACK HINGE
|
(a) Remove the bolt. |
|
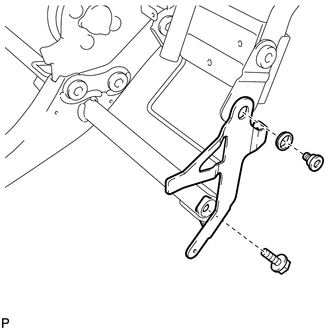
(b) Using a T45 "TORX" socket, remove the "TORX" bolt, bush and the rear center seatback hinge.
30. REMOVE REAR SEAT LEG ASSEMBLY RH
|
(a) Using a T55 "TORX" socket, remove the 5 "TORX" bolts and the rear seat leg assembly RH. |
|
 Removal
REMOVAL
PROCEDURE
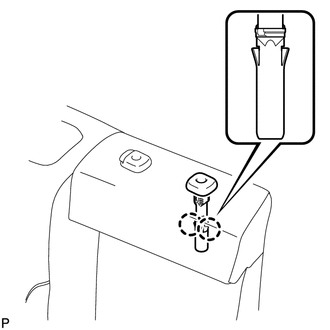
1. REMOVE REAR SEAT HEADREST ASSEMBLY
(a) Press the headrest support button and pull up the rear seat headrest
assembly as shown in the illustration.
...
 Reassembly
REASSEMBLY
PROCEDURE
1. INSTALL REAR SEAT LEG ASSEMBLY RH
(a) Using a T55 "TORX" socket wrench, install the rear seat leg assembly
RH with the 5 "TORX" bolts.
...
Other materials about Toyota Venza:
Inspection
INSPECTION
PROCEDURE
1. INSPECT UNIVERSAL JOINT SPIDER ASSEMBLY
(a) Check the spider bearing axial play by turning the flange while holding
the shaft tightly.
HINT:
If necessary, replace the propeller with center bearing shaft assembly. ...
Certification ECU Communication Stop Mode
DESCRIPTION
Detection Item
Symptom
Trouble Area
Certification ECU Communication Stop Mode
"Smart Access/Smart Key/Wireless Tuner" is not displayed on
"CAN Bus Check&q ...
Poor Sound Quality in All Modes (Low Volume)
PROCEDURE
1.
CHECK AUDIO SETTINGS
(a) Set treble, middle and bass to the initial values and check that the sound
is normal.
OK:
The sound returns to normal.
HINT:
Sound quality adjustment measures vary according to the ...

0.1368