Toyota Venza: Automatic anti-glare function
Responding to the level of brightness of the headlights of vehicles behind, the reflected light is automatically reduced.
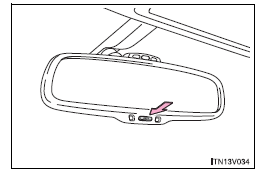
Changing automatic anti-glare function mode ON/OFF
When the automatic anti-glare function is in ON mode, the indicator illuminates.
►Vehicles with smart key system The function will set to ON mode each time the “ENGINE START STOP” switch is turned to IGNITION ON mode.
Pressing the button turns the function to OFF mode. (The indicator also turns off.)
►Vehicles without smart key system The function will set to ON mode each time the engine switch is turned to the “ON” position.
Pressing the button turns the function to OFF mode. (The indicator also turns off.)
- To prevent sensor error
To ensure correct functioning of the sensors, do not touch or cover the sensors.
CAUTION
- While driving
Do not adjust the position of the mirror.
Doing so may lead to mishandling of the vehicle and an accident, or resulting in death or serious injury.
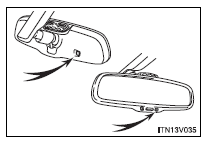
 Adjusting the height of rear view mirror
Adjust the height of the rear view mirror by moving it up and down. ...
 Outside rear view mirrors
Mirror angle can be adjusted using the switch.
Select a mirror to adjust.
1. Left
2. Right
Adjust the mirror.
1. Up
2. Right
3. Down
4. Left ...
Other materials about Toyota Venza:
Diagnostic Trouble Code Chart
DIAGNOSTIC TROUBLE CODE CHART
Power Window Control System
DTC Code
Detection Item
Trouble Area
See page
B2311
Power Window Motor Malfunction
1. Battery disconnected when ignit ...
Inspection
INSPECTION
PROCEDURE
1. INSPECT FRONT POWER WINDOW REGULATOR MOTOR ASSEMBLY LH
(a) Apply positive (+) battery voltage to connector terminal 2 (B).
NOTICE:
Do not apply positive (+) battery voltage to any terminals other than
terminal 2 ...
Back Door Motor Clutch Malfunction (B2225)
DESCRIPTION
When an electrical malfunction (open or short) is detected in the clutch circuit
of the power back door ECU (power back door motor unit) while the power back door
is operating, the power back door ECU (power back door motor unit) stores DTC B2 ...

0.1267