Toyota Venza: Security Horn Assembly
Removal
REMOVAL
PROCEDURE
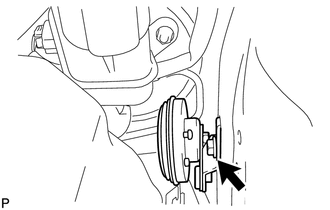
1. REMOVE SECURITY HORN ASSEMBLY
|
(a) Remove the bolt and disconnect the security horn assembly. |
|
|
(b) Disconnect the connector and remove the security horn assembly. |
|

Inspection
INSPECTION
PROCEDURE
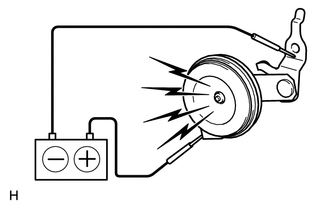
1. INSPECT SECURITY HORN ASSEMBLY
|
(a) Check the operation of the security horn assembly. Standard:
If the result is not as specified, replace the security horn assembly. |
|
Installation
INSTALLATION
PROCEDURE
1. INSTALL SECURITY HORN ASSEMBLY
|
(a) Connect the connector. |
|
.png)
|
(b) Install the security horn assembly with the bolt. Torque: 8.0 N·m {82 kgf·cm, 71 in·lbf} |
|
.png)
 Installation
INSTALLATION
PROCEDURE
1. INSTALL FRONT DOOR OUTSIDE HANDLE ASSEMBLY
(a) Insert the front end of the front door outside handle assembly into
the front door outside handle frame.
...

Other materials about Toyota Venza:
Engine Speed Signal Error (Test Mode DTC) (C2194/94)
DESCRIPTION
The tire pressure warning ECU receives an engine speed signal from the ECM. This
DTC is stored upon entering signal check mode (test mode), and cleared when an engine
speed signal of 1000 rpm is detected for 3 seconds or more. This DTC is outp ...
Installation
INSTALLATION
PROCEDURE
1. INSTALL PARK/NEUTRAL POSITION SWITCH ASSEMBLY
(a) Move the shift lever to N.
(b) Align the protrusions of the park/neutral position switch.
Text in Illustration
*1
Protrusion
...
Wireless Transmitter Memory Function does not Operate
DESCRIPTION
With the ignition switch off and the driver door closed, pressing the manual
lock or unlock switch on the power window regulator master switch assembly while
holding a seat memory switch (M1 switch or M2 switch) will register the transmitter
...

0.155