
Toyota Venza: Lost Communication with Clearance Warning ECU (U1110)
DESCRIPTION
|
DTC Code |
DTC Detection Condition |
Trouble Area |
|---|---|---|
|
U1110 |
No communication from the clearance warning ECU assembly continues. |
|
WIRING DIAGRAM
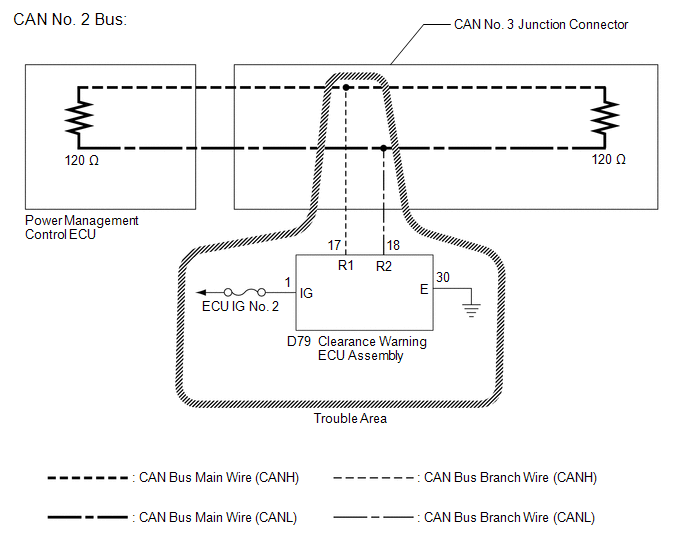
CAUTION / NOTICE / HINT
NOTICE:
- Turn the ignition switch off before measuring the resistances between CAN bus main wires and between CAN bus branch wires.
- Turn the ignition switch off before inspecting CAN bus wires for a ground short.
- After the ignition switch is turned off, check that the key reminder warning system and light reminder warning system are not operating.
- Before measuring the resistance, leave the vehicle as is for at least 1 minute and do not operate the ignition switch, any other switches or the doors. If any doors need to be opened in order to check connectors, open the doors and leave them open.
HINT:
- Operating the ignition switch, any other switches or a door triggers related ECU and sensor communication on the CAN. This communication will cause the resistance value to change.
- Even after DTCs are cleared, if a DTC is stored again after driving the vehicle for a while, the malfunction may be occurring due to vibration of the vehicle. In such a case, wiggling the ECUs or wire harness while performing the inspection below may help determine the cause of the malfunction.
PROCEDURE
|
1. |
RECONFIRM DTC OUTPUT |
(a) Reconfirm DTCs.
HINT:
If CAN No. 2 bus DTC U1002 is output from the power management control ECU (Techstream display: PM1 Gateway), troubleshoot for U1002 and check for malfunctions in the CAN No. 2 main bus circuit.
|
Result |
Proceed to |
|---|---|
|
U1002 is not output from power management control ECU (Techstream display: PM1 Gateway) |
A |
|
U1002 is output from power management control ECU (Techstream display: PM1 Gateway) |
B |
| B | .gif) |
GO TO CIRCUITS INDICATED BY OUTPUT DTCS |
|
.gif)
|
2. |
CHECK FOR OPEN IN CAN BUS WIRES (CLEARANCE WARNING ECU ASSEMBLY BRANCH WIRE) |
(a) Turn the ignition switch off.
|
(b) Disconnect the clearance warning ECU assembly connector. Text in Illustration
|
|
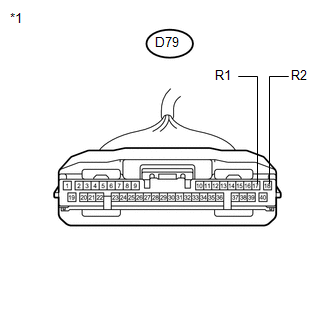
(c) Measure the resistance according to the value(s) in the table below.
Standard Resistance:
|
Tester Connection |
Condition |
Specified Value |
|---|---|---|
|
D79-17 (R1) - D79-18 (R2) |
Ignition switch off |
54 to 69 Ω |
| NG | |
REPAIR OR REPLACE CAN BUS BRANCH WIRE (CLEARANCE WARNING ECU ASSEMBLY BRANCH WIRE) |
|
|
3. |
CHECK HARNESS AND CONNECTOR (POWER SOURCE TERMINAL) |
(a) Turn the ignition switch to ON.
|
(b) Measure the voltage according to the value(s) in the table below. Standard Voltage:
|
|
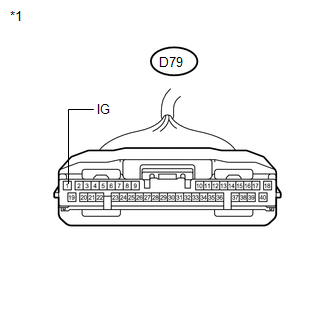
| NG | |
REPAIR OR REPLACE HARNESS OR CONNECTOR (POWER SOURCE CIRCUIT) |
|
|
4. |
CHECK HARNESS AND CONNECTOR (GROUND TERMINAL) |
(a) Turn the ignition switch off.
|
(b) Measure the resistance according to the value(s) in the table below. Standard Resistance:
|
|
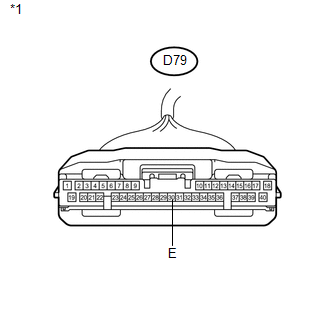
| OK | |
REPLACE CLEARANCE WARNING ECU ASSEMBLY |
| NG | |
REPAIR OR REPLACE HARNESS OR CONNECTOR (GROUND TERMINAL) |
 Diagnostic Trouble Code Chart
DIAGNOSTIC TROUBLE CODE CHART
CAN Communication System
DTC Code
Detection Item
Output ECU/Techstream Display
See page
U0100
Lo ...
 Lost Communication with Gateway Module (Power Management1) (U1002)
DESCRIPTION
The power management control ECU will store this DTC when no signals
can be received from the ECUs that have been memorized as those that are
connected to the CAN No. 2 bus ...
Other materials about Toyota Venza:
Passenger Airbag ON/OFF Indicator Circuit Malfunction (B1660/43)
DESCRIPTION
The passenger airbag ON/OFF indicator circuit consists of the center airbag sensor
assembly and accessory meter assembly (passenger airbag ON/OFF indicator).
The passenger airbag ON/OFF indicator indicates the operation condition of the
front ...
Air Conditioning Panel
Components
COMPONENTS
ILLUSTRATION
Installation
INSTALLATION
PROCEDURE
1. INSTALL AIR CONDITIONING CONTROL ASSEMBLY
(a) Connect the connector.
(b) Engage the 2 clips and 4 guides.
(c) Rem ...
Operation Check
OPERATION CHECK
1. CHECK POWER SEAT FUNCTION
(a) Check the basic functions.
Text in Illustration
*1
Slide Function
*2
Front Vertical Function
*3
Lifter Function
...

0.1614