
Toyota Venza: Inspection
INSPECTION
PROCEDURE
1. INSPECT FRONT DRIVE SHAFT ASSEMBLY
|
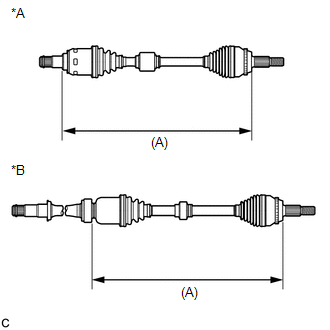
(a) Check whether the drive shaft dimensions are within the following specifications. Text in Illustration
HINT: The following table shows the dimension (A) of the drive shaft. Dimension (A) for 1AR-FE
|
|
|
(b) Check that there is no excessive play in the outboard joint. |
|
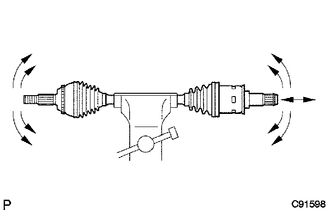
(c) Check that the inboard joint slides smoothly in the thrust direction.
(d) Check that there is no excessive play in the radial direction of the inboard joint.
(e) Check the boots for damage.
 Disassembly
DISASSEMBLY
PROCEDURE
1. REMOVE FRONT DRIVE SHAFT HOLE SNAP RING (for LH Side)
(a) Using a screwdriver, remove the front drive shaft hole snap ring.
...
 Reassembly
REASSEMBLY
PROCEDURE
1. INSTALL BEARING BRACKET HOLE SNAP RING (for RH Side)
(a) Install a new bearing bracket hole snap ring to the front drive shaft assembly
RH.
2. INSTALL FRONT DRIVE SHAFT B ...
Other materials about Toyota Venza:
Transmission Wire(when Not Using The Engine Support Bridge)
Components
COMPONENTS
ILLUSTRATION
Installation
INSTALLATION
PROCEDURE
1. INSTALL TRANSMISSION WIRE
(a) Coat the O-ring with ATF.
(b) Coat the bolt with ATF.
(c) Install the tr ...
Terminals Of Ecu
TERMINALS OF ECU
1. CHECK AIR CONDITIONING AMPLIFIER ASSEMBLY
(a) Disconnect the D47 air conditioning amplifier assembly connector.
(b) Measure the voltage and resistance according to the value(s) in the table
below.
HINT:
Measure the values on the wi ...
Rear Airbag Sensor RH Circuit Malfunction (B1630/23)
DESCRIPTION
The side collision sensor RH circuit (to determine deployment of the front seat
side airbag assembly RH and curtain shield airbag assembly RH) is composed of the
center airbag sensor assembly, rear airbag sensor RH and side airbag sensor RH.
...

0.1193