Toyota Venza: Precaution
PRECAUTION
CAUTION:
Replace any faulty seat belt components (outer belt, inner belt, bolts, nuts, adjustable shoulder anchor, tether anchor hardware and other related parts). When inspecting a vehicle that was in a collision, be sure to check all of the seat belt systems regardless of whether or not the system was activated in the collision. Replace any damaged or malfunctioning components.
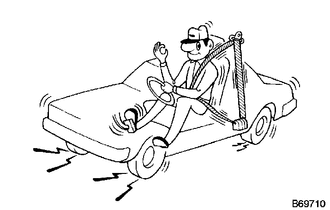
1. ROAD TEST (IN SAFE AREA)
CAUTION:
Conduct this test in a safe area.
HINT:
This road test should be performed with the driver seat and the front passenger seat occupied.
(a) Fasten the front seat belts.
(b) Drive the vehicle at 16 km/h (10 mph) and firmly depress the brake pedal.
Check that the belts lock and cannot be extended at this time. If a belt does not
lock, replace the seat belt assembly (See page
.gif) ).
).
HINT:
Inspect the seat belt assembly before installing it (See page
).
 Components
COMPONENTS
ILLUSTRATION
...
 Removal
REMOVAL
PROCEDURE
1. DISCONNECT CABLE FROM NEGATIVE BATTERY TERMINAL
CAUTION:
Wait at least 90 seconds after disconnecting the cable from the negative (-)
battery terminal to disable the SRS sys ...
Other materials about Toyota Venza:
Setting up the displays
Press the “SETUP” button while the
vehicle is stopped.
The “Custom Settings” screen is displayed on the multi-information display.
If left idle for approximately 10 seconds, the display will revert to the previous
screen.
Select “Display / ...
Checking and replacing fuses
If any of the electrical components do not operate, a fuse may have blown.
If this happens, check and replace the fuses as necessary.
Vehicles with smart key system:
Turn the “ENGINE START STOP” switch off.
Vehicles without smart key system:
Turn th ...
Daytime Running Light Relay Circuit
DESCRIPTION
The main body ECU (driver side junction block assembly) controls the daytime
running lights.
WIRING DIAGRAM
1. for Halogen Headlight
2. for HID Headlight
PROCEDURE
1.
PERFORM ACTIVE TEST USING TECHSTREAM
...

0.1365