Toyota Venza: Luggage compartment features
- Cargo hooks
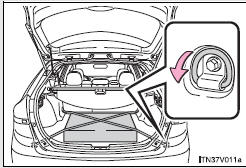
Cargo hooks are provided for securing loose items.
- Shopping bag hooks
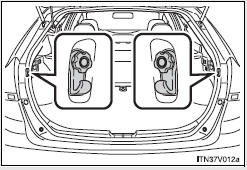
- Auxiliary box
Lift the right side deck board.
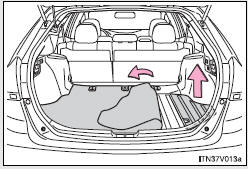
- Luggage cover
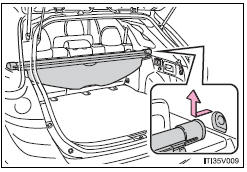
Pull out the luggage cover and hook it on the anchors.
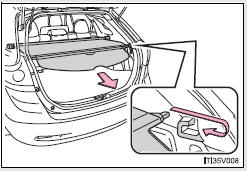
Removing luggage cover
Retract the cover and release both ends, then lift it out.
After removing the luggage cover, place it somewhere other than the passenger compartment.
CAUTION
- When the cargo hooks are not in use
To avoid injury, always return the cargo hooks to their positions when they are not in use.
- While driving
Do not place anything on the luggage cover. Such items may be thrown about and possibly injure people in the vehicle during sudden braking, sudden swerving or an accident.
 Floor mats
Use only floor mats designed specifically for vehicles of the same model and
model year as your vehicle. Fix them securely in place onto the carpet.
Insert the retaining hooks (clips) into the fl ...
 Garage door opener
The garage door opener can be programmed to operate garage doors, gates, entry
doors, door locks, home lighting systems, security systems, and other devices.
The garage door opener (HomeLink® Univ ...
Other materials about Toyota Venza:
Internal Control Module Monitoring Processor Performance (P060A)
MONITOR DESCRIPTION
The main CPU and sub CPU of the ECM perform data communication between each other.
The main CPU monitors the communications and WDC pulses from the sub CPU. When the
signal malfunctions below are detected, the DTC is output.
...
Installation
INSTALLATION
CAUTION / NOTICE / HINT
HINT:
Perform "Inspection After Repair" after replacing the engine assembly (See page
).
PROCEDURE
1. INSTALL ENGINE HANGERS
2. REMOVE ENGINE STAND
(a) Remove the engine stand.
3. INSTALL ENGINE WIRE
...
Accelerator Pedal
Components
COMPONENTS
ILLUSTRATION
On-vehicle Inspection
ON-VEHICLE INSPECTION
PROCEDURE
1. INSPECT ACCELERATOR PEDAL SENSOR ASSEMBLY
(a) Connect the Techstream to the DLC3.
(b) Turn the ignition switch to ON.
(c) Turn the Techstream on.
(d) En ...

0.1138