
Toyota Venza: Installation
INSTALLATION
PROCEDURE
1. INSTALL REAR WIPER MOTOR AND BRACKET ASSEMBLY
|
(a) Install the rear wiper motor and bracket assembly with the 3 bolts. Torque: 5.5 N·m {56 kgf·cm, 49 in·lbf} |
|
.png)
(b) Connect the connector.
2. INSTALL REAR WIPER MOTOR GROMMET
|
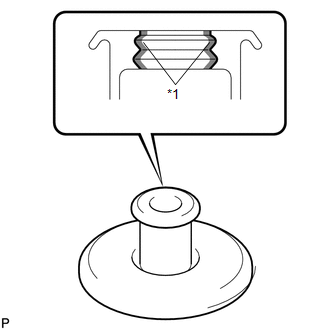
(a) Apply MP grease to the entire surface of the wiper motor grommet lip. Text in Illustration
HINT: Make sure that the hole does not get clogged with grease and the grooves on the lip are filled with grease. |
|
|
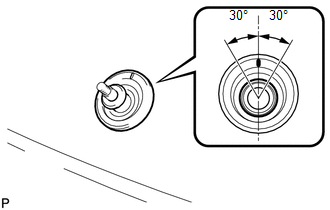
(b) Install the rear wiper motor grommet with the position mark facing upward as shown in the illustration. |
|
3. INSTALL REAR WIPER ARM AND BLADE ASSEMBLY
(a) Stop the wiper motor at the automatic stop position.
(b) When reusing the rear wiper arm and blade assembly:
|
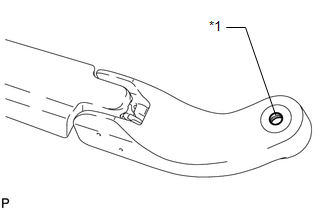
(1) Clean the wiper arm serrations. Text in Illustration
|
|
(c) When reusing the rear wiper motor and bracket assembly:
|
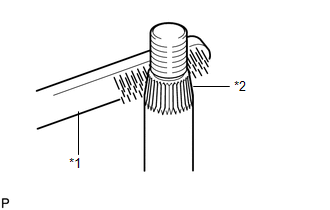
(1) Clean the wiper pivot serrations with a wire brush. Text in Illustration
|
|
|
(d) Install the rear wiper arm and blade assembly with the nut to the position shown in the illustration. Standard Measurement
Torque: 5.5 N·m {56 kgf·cm, 49 in·lbf} |
|
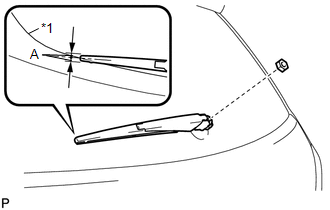
(e) Operate the rear wiper while spraying washer fluid onto the back door glass. Make sure that the rear wiper functions properly and the wiper does not come into contact with the vehicle body.
4. INSTALL REAR WIPER ARM HEAD CAP
|
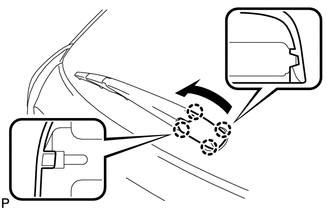
(a) Engage the 4 claws to install the cap as shown in the illustration. |
|
5. INSTALL BACK DOOR PANEL TRIM ASSEMBLY
.gif)
 Inspection
INSPECTION
PROCEDURE
1. INSPECT REAR WIPER MOTOR AND BRACKET ASSEMBLY
(a) Check the wiper low operation.
(1) Connect a battery positive (+) lead to terminal 4 (+B), and a negative (-)
lead to ...
 Rear Wiper Rubber
Components
COMPONENTS
ILLUSTRATION
Replacement
REPLACEMENT
PROCEDURE
1. REMOVE REAR WIPER BLADE
(a) Disconnect the rear wiper arm head cap.
...
Other materials about Toyota Venza:
Charge Warning Light Comes ON while Driving
PROCEDURE
1.
CHECK LOCK FUNCTION OF GENERATOR CLUTCH PULLEY
(a) Check the lock function with the pulley installed in the vehicle.
(1) Visually check that the rotor in the generator operates with the engine running.
(b) Check ...
Problem Symptoms Table
PROBLEM SYMPTOMS TABLE
HINT:
Use the table below to help determine the cause of problem symptoms.
If multiple suspected areas are listed, the potential causes of the symptoms
are listed in order of probability in the "Suspected Area" ...
Reassembly
REASSEMBLY
PROCEDURE
1. INSTALL NO. 2 STEERING RACK BOOT
(a) Apply lithium soap base glycol grease to the inside of the small
opening of a new No. 2 steering rack boot.
(b) Install the No. 2 ste ...

0.1148