
Toyota Venza: Adjustment
ADJUSTMENT
PROCEDURE
1. ADJUST STEERING WHEEL OFF CENTER
(a) Inspect steering wheel off center.
|
(1) Apply masking tape on the top center of the steering wheel and steering column upper cover. Text in Illustration
|
|
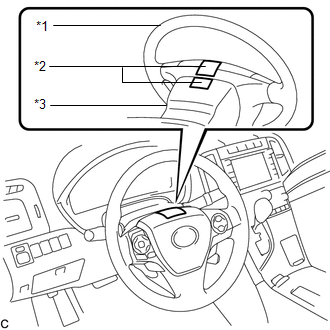
(2) Drive the vehicle in a straight line for 100 meters at a constant speed of 56 km/h (35 mph), while holding the steering wheel to maintain the course.
|
(3) Draw a line on the masking tape as shown in the illustration. Text in Illustration
|
|
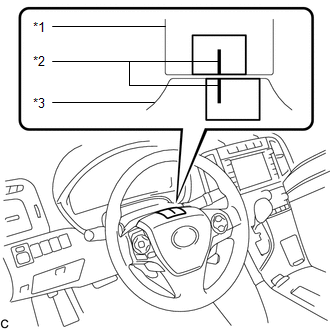
(4) Turn the steering wheel to the center position.
HINT:
Look at the upper surface of the steering wheel, steering spoke, and SRS airbag line to find the center position.
|
(5) Draw a new line on the masking tape on the steering wheel as shown in the illustration. Text in Illustration
|
|
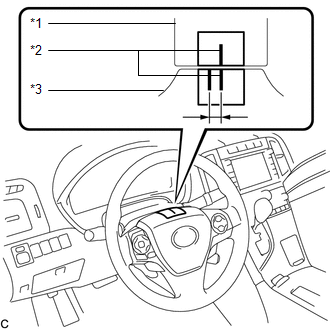
(6) Measure the distance between the 2 lines on the masking tape on the steering wheel.
(7) Convert the measured distance to steering angle.
HINT:
- Measured distance 1 mm (0.0394 in.) = steering angle of approximately 1 degree.
- Make a note of the steering angle.
(b) Adjust steering angle.
|
(1) Draw a matchmark on the RH and LH tie rod ends and rack ends respectively where it can be easily seen. Text in Illustration
|
|
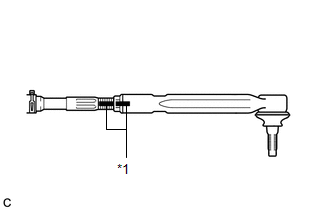
(2) Using a paper gauge, measure the distance from the RH and LH tie rod ends to the rack end screws.
HINT:
- Measure both the RH and LH sides.
- Make a note of the measured values.
|
(3) Remove the RH and LH boot clips from the rack boots. |
|
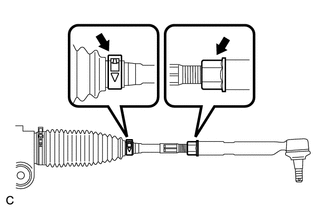
(4) Loosen the RH and LH lock nuts.
(5) Turn the RH and LH rack ends by the same amount (but in different directions) according to the steering angle.
HINT:
One 360 degree turn of the rack end (1.5 mm (0.0591 in.) horizontal movement) equals to 12 degrees of steering angle.
(6) Tighten the RH and LH lock nuts to the specified torque.
Torque:
88 N·m {897 kgf·cm, 65 ft·lbf}
NOTICE:
Make sure that the difference in length between the RH and LH tie rod ends and rack end screws is within 1.5 mm (0.0591 in.).
(7) Install the RH and LH boot clips.
 Problem Symptoms Table
PROBLEM SYMPTOMS TABLE
HINT:
Use the table below to help determine the cause of problem symptoms.
If multiple suspected areas are listed, the potential causes of the symptoms
are lis ...
 On-vehicle Inspection
ON-VEHICLE INSPECTION
PROCEDURE
1. INSPECT STEERING WHEEL FREE PLAY
(a) Stop the vehicle and position the front wheels straight ahead.
(b) Gently turn the steering wheel right and left, and check ...
Other materials about Toyota Venza:
Brake Pedal Load Sensing Switch (C1267/67)
DESCRIPTION
The brake pedal load sensing switch is turned on when the brake pedal is depressed
with force exceeding a predetermined level.
The skid control ECU detects if the brake pedal is depressed or not via this
circuit.
DTC Code
...
On-vehicle Inspection
ON-VEHICLE INSPECTION
PROCEDURE
1. INSPECT DISCHARGE HEADLIGHT BULB
NOTICE:
Confirm the following items before replacing a discharge headlight bulb. If a
malfunction is discovered and repaired, perform the inspection again to confirm
the repair.
...
Initialization
INITIALIZATION
HINT:
In vehicles equipped with the push-button start function, the starting function
may not be operational after recharging or while jump-starting a discharged battery.
This condition is most likely to occur if battery voltage drops belo ...

0.1779