Toyota Venza: Transponder Key Ecu
Components
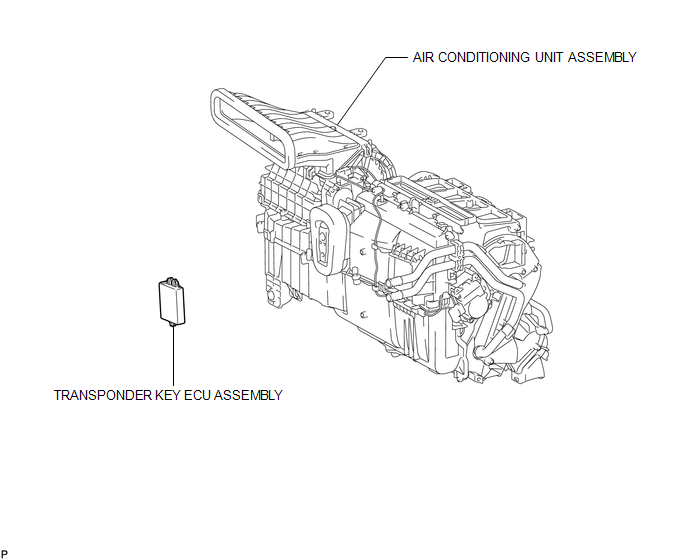
COMPONENTS
ILLUSTRATION
Removal
REMOVAL
PROCEDURE
1. REMOVE AIR CONDITIONING UNIT ASSEMBLY
HINT:
Refer to the procedure up to Remove Air Conditioning Unit Assembly (See page
.gif) ).
).
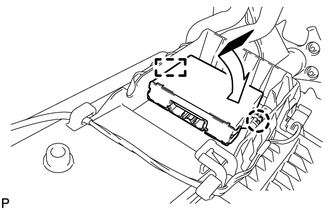
2. REMOVE TRANSPONDER KEY ECU ASSEMBLY
|
(a) Disengage the claw and guide and remove the transponder key ECU assembly. |
|

Installation
INSTALLATION
PROCEDURE
1. INSTALL TRANSPONDER KEY ECU ASSEMBLY
|
(a) Engage the guide and claw and install the transponder key ECU assembly. |
|
2. INSTALL AIR CONDITIONING UNIT ASSEMBLY
HINT:
Refer to the procedure from Install Air Conditioning Unit Assembly (See page
.gif) ).
).
3. REGISTER KEY
NOTICE:
When replacing the transponder key ECU assembly, perform initialization (See
page ).
 Transponder Key Amplifier
Components
COMPONENTS
ILLUSTRATION
Removal
REMOVAL
PROCEDURE
1. REMOVE FRONT DOOR SCUFF PLATE
2. REMOVE COWL SIDE TRIM SUB-ASSEMBLY
3. REMOVE LOWER NO. 1 INSTRUMENT PANEL FINISH PA ...
Other materials about Toyota Venza:
Dtc Check / Clear
DTC CHECK / CLEAR
1. CHECK FOR TRANSPONDER KEY ECU DTC
(a) Connect the Techstream to the DLC3.
(b) Turn the ignition switch to ON.
(c) Turn the Techstream on.
(d) Enter the following menus: Body Electrical / Immobiliser / Trouble Codes.
(e) Check the det ...
Interior Light Auto Cut Circuit
DESCRIPTION
When battery saving control operates while the interior lights are on, the main
body ECU (driver side junction block assembly) opens the DOME CUT relay to turn
off the lights.
WIRING DIAGRAM
CAUTION / NOTICE / HINT
NOTICE:
Inspect the fu ...
No Answer-Back
DESCRIPTION
In some cases, wireless door lock control functions are normal but the hazard
warning light and/or wireless door lock buzzer answer-back function(s) does not
operate. In such cases, the main body ECU (driver side junction block assembly)
haz ...

0.1457