Toyota Venza: Rocker Panel Moulding
Components
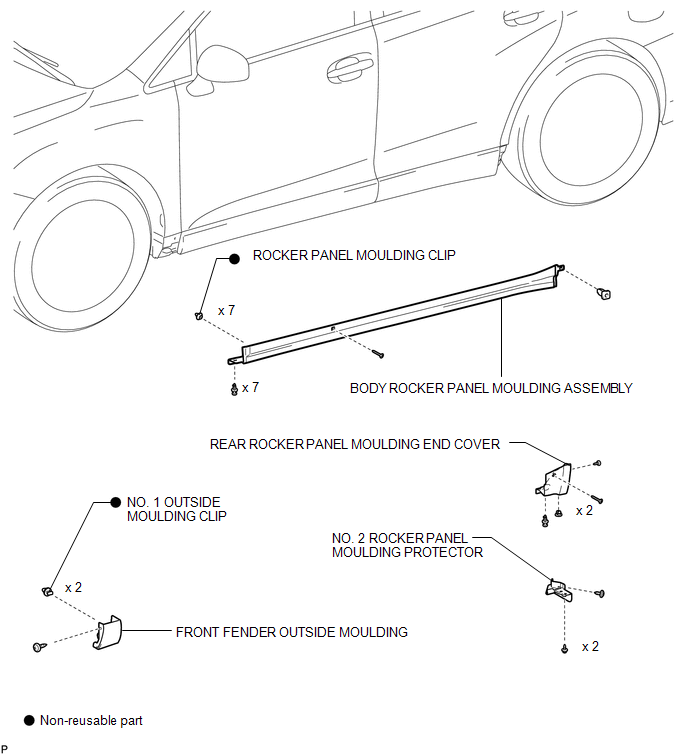
COMPONENTS
ILLUSTRATION
Removal
REMOVAL
PROCEDURE
1. REMOVE FRONT FENDER OUTSIDE MOULDING
.gif)
2. REMOVE NO. 2 ROCKER PANEL MOULDING PROTECTOR
3. REMOVE REAR ROCKER PANEL MOULDING END COVER
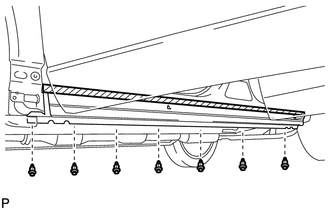
4. REMOVE BODY ROCKER PANEL MOULDING ASSEMBLY
|
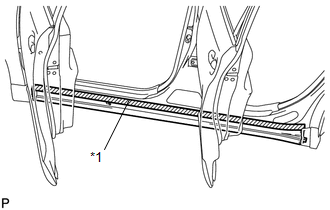
(a) Put protective tape around the body rocker panel moulding assembly. Text in Illustration
|
|
|
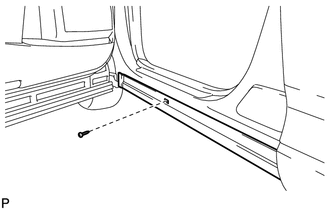
(b) Remove the screw. |
|
|
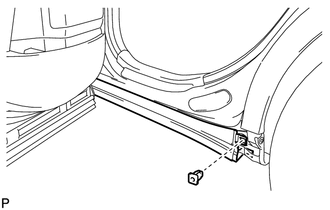
(c) Remove the grommet. |
|
|
(d) Remove the 7 clips. |
|
|
(e) Disengage the 7 clips to remove the body rocker panel moulding assembly. |
|
(f) Remove the 7 clips (rocker panel moulding clip).
Installation
INSTALLATION
PROCEDURE
1. INSTALL BODY ROCKER PANEL MOULDING ASSEMBLY
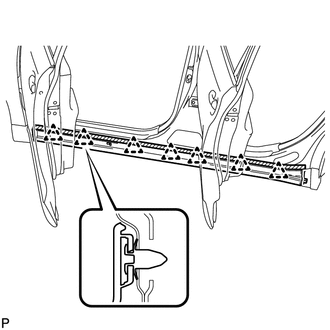
(a) Install 7 new clips (rocker panel moulding clip) to the body rocker panel moulding assembly.
|
(b) Engage the 7 clips to install the body rocker panel moulding assembly. |
|
.png)
|
(c) Install the screw. |
|
.png)
|
(d) Install the grommet. |
|
.png)
|
(e) Install the 7 clips. |
|
.png)
2. INSTALL REAR ROCKER PANEL MOULDING END COVER
.gif)
3. INSTALL NO. 2 ROCKER PANEL MOULDING PROTECTOR
4. INSTALL FRONT FENDER OUTSIDE MOULDING
 Rear Wheel House Plate
Components
COMPONENTS
ILLUSTRATION
Installation
INSTALLATION
PROCEDURE
1. INSTALL NO. 2 ROCKER PANEL MOULDING PROTECTOR
(a) Install the No. 2 rocker panel moulding protector wi ...

Other materials about Toyota Venza:
Front Passenger Side Seat Belt Warning Light Malfunction
DESCRIPTION
The occupant classification ECU detects the state of the front seat inner belt
assembly RH and load sensor when the front passenger side seat is occupied with
the ignition switch ON. If the front passenger side seat belt is not fastened, the
...
Dtc Check / Clear
DTC CHECK / CLEAR
1. CHECK DTC (CHECK USING TECHSTREAM)
(a) Connect the Techstream to the DLC3.
(b) Turn the ignition switch to ON.
(c) Turn the Techstream on.
(d) Enter the following menus: Body Electrical / Navigation System / Trouble
Codes.
(e) Chec ...
Adjustment
ADJUSTMENT
PROCEDURE
1. INSPECT TIRES
(a) Inspect the tires (See page ).
2. MEASURE VEHICLE HEIGHT
NOTICE:
Before inspecting the wheel alignment, adjust the vehicle height to
the specified value.
Be sure to perform measurement on a level ...

0.1298