Toyota Venza: Removal
REMOVAL
PROCEDURE
1. REMOVE YAW RATE AND ACCELERATION SENSOR
HINT:
Refer to the instructions for Removal of the yaw rate and acceleration sensor
(See page .gif) ).
).
2. REMOVE REAR NO. 2 AIR DUCT
3. REMOVE REAR NO. 1 AIR DUCT
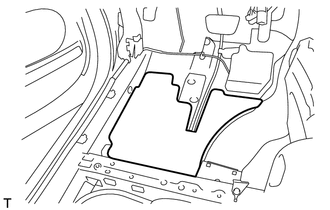
4. REMOVE FRONT NO. 2 FLOOR SILENCER
|
(a) Remove the front No. 2 floor silencer. |
|
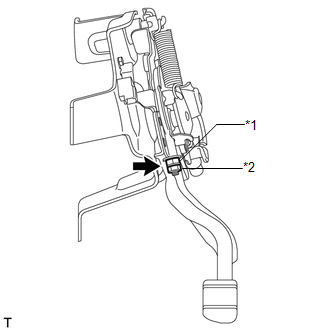
5. LOOSEN PARKING BRAKE
|
(a) Remove the lock nut and No. 1 wire adjusting nut to completely loosen the parking brake. Text in Illustration
|
|
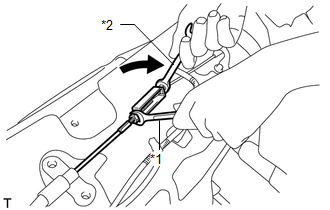
6. DISCONNECT NO. 4 PARKING BRAKE CABLE ASSEMBLY
|
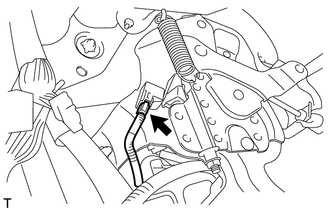
(a) Holding the lock nut of the No. 1 parking brake cable assembly, loosen the turnbuckle of the No. 4 parking brake cable assembly to disconnect the No. 4 parking brake cable assembly from the No. 1 parking brake cable assembly. Text in Illustration
|
|
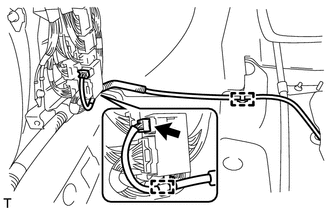
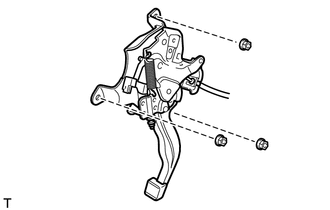
7. REMOVE PARKING BRAKE PEDAL ASSEMBLY
|
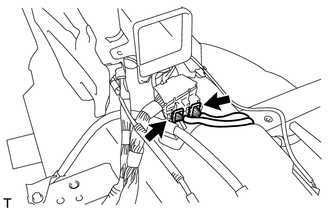
(a) Disconnect the heated oxygen sensor connector and disengage the 2 clamps (for 2GR-FE). |
|
|
(b) Disconnect the 2 connectors. |
|
|
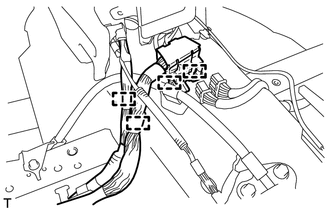
(c) Disengage the 4 clamps and separate the wire harness. |
|
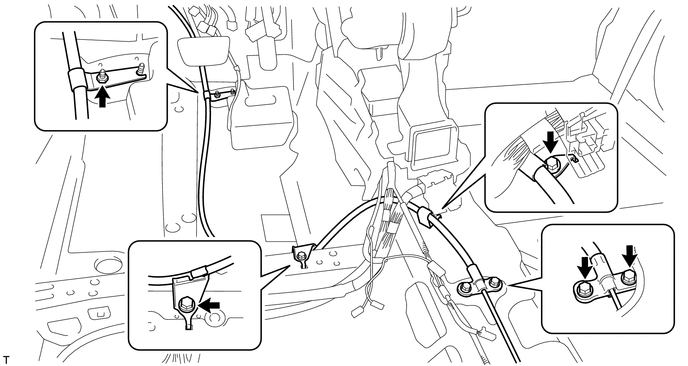
(d) Remove the nut and 4 bolts, and separate the No. 1 parking brake cable assembly from the body.
|
(e) Disconnect the parking brake switch connector. |
|
|
(f) Remove the 3 nuts and parking brake pedal assembly. |
|
 Components
COMPONENTS
ILLUSTRATION
ILLUSTRATION
ILLUSTRATION
ILLUSTRATION
...
 Disassembly
DISASSEMBLY
PROCEDURE
1. REMOVE NO. 1 PARKING BRAKE CABLE ASSEMBLY
2. REMOVE PARKING BRAKE SWITCH ASSEMBLY
3. REMOVE PARKING PEDAL PAD
(a) Remove the parking pedal pad from the parking brak ...
Other materials about Toyota Venza:
On-vehicle Inspection
ON-VEHICLE INSPECTION
PROCEDURE
1. INSPECT REAR WIPER MOTOR AND BRACKET ASSEMBLY
(a) Operate the rear wiper motor and bracket assembly.
(b) Stop the rear wiper motor and bracket assembly operation.
...
Installation
INSTALLATION
PROCEDURE
1. INSTALL FRONT NO. 1 STABILIZER BAR BUSHING
(a) Install the 2 front No. 1 stabilizer bar bushings to the front stabilizer
bar as shown in the illustration.
Text in Illustration
*1
...
Diagnosis System
DIAGNOSIS SYSTEM
1. DESCRIPTION
(a) When troubleshooting a vehicle with a diagnosis system, the only difference
from the usual troubleshooting procedure is connecting the Techstream to the vehicle
and reading various data output from the clearance warnin ...

0.1291