Toyota Venza: Installation
INSTALLATION
PROCEDURE
1. INSTALL FRONT BUMPER ASSEMBLY
(a) Connect each connector.
|
(b) Engage the 4 claws to install the front bumper assembly. HINT: Use the same procedure for the RH side and LH side. |
|
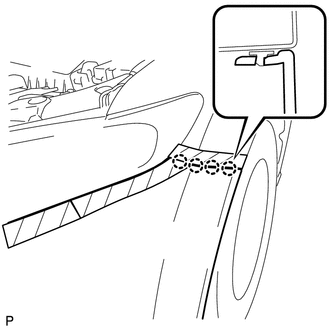
(c) Install the clip.
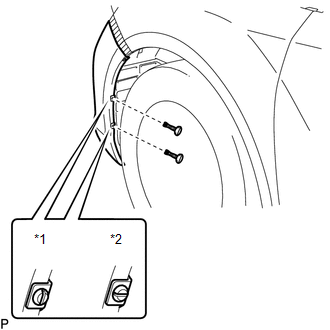
(d) Install the 2 bolts and 8 screws.
|
(e) Install the 2 pin hold clips. Text in Illustration
NOTICE: Insert the pin hold clip with the slot aligned vertically. Do not rotate the clip after inserting it. After installation, confirm that the slot is vertical. HINT: Use the same procedure for the RH side and LH side. |
|
2. INSTALL RADIATOR GRILLE
.gif)
3. INSTALL COOL AIR INTAKE DUCT SEAL
(a) Install the cool air intake duct seal with the 12 clips.
4. ADJUST FOG LIGHT ASSEMBLY
(See page )
 Reassembly
REASSEMBLY
PROCEDURE
1. INSTALL FRONT BUMPER SIDE RETAINER LH
(a) Engage the claw and install the front bumper side retainer LH.
Text in Illustration
*1
...

Other materials about Toyota Venza:
Inspection
INSPECTION
PROCEDURE
1. INSPECT CYLINDER BLOCK FOR WARPAGE
(a) Using a precision straightedge and feeler gauge, check the surface
that is in contact with the cylinder head gasket for warpage.
Maximum Warpage:
0.05 mm (0.00197 in.)
I ...
Reassembly
REASSEMBLY
PROCEDURE
1. INSTALL MULTIPLEX NETWORK DOOR ECU
(a) Connect the connector and install the multiplex network door ECU.
(b) Install the flat cable connector as shown in the illus ...
Reassembly
REASSEMBLY
PROCEDURE
1. INSTALL SHIFT SOLENOID VALVE SL4
(a) Coat the shift solenoid valve SL4 and bolt with ATF.
Text in Illustration
*1
Lock Plate
*2
Solenoid V ...

0.1277