Toyota Venza: Headlight Signal Circuit
DESCRIPTION
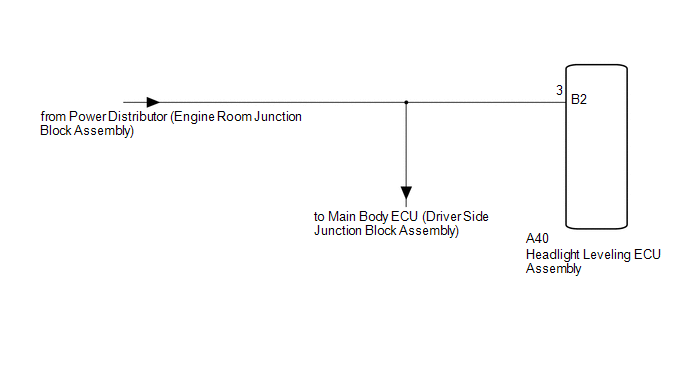
The headlight leveling ECU assembly detects the low beam headlights status.
WIRING DIAGRAM

CAUTION / NOTICE / HINT
NOTICE:
First check that the low beam headlights operate normally.
PROCEDURE
|
1. |
CHECK HARNESS AND CONNECTOR (ENGINE ROOM JUNCTION BLOCK ASSEMBLY - ECU) |
|
(a) Disconnect the A40 headlight leveling ECU assembly connector. |
|
(b) Measure the voltage according to the value(s) in the table below.
Standard Voltage:
|
Tester Connection |
Switch Condition |
Specified Condition |
|---|---|---|
|
A40-3 (B2) - Body ground |
Light control switch in head position |
11 to 14 V |
|
*1 |
Front view of wire harness connector (to Headlight Leveling ECU assembly) |
| OK | .gif) |
PROCEED TO NEXT SUSPECTED AREA SHOWN IN PROBLEM SYMPTOMS TABLE |
| NG | .gif) |
REPAIR OR REPLACE HARNESS OR CONNECTOR |
 Front Fog Light Circuit
DESCRIPTION
The main body ECU (driver side junction block assembly) controls the fog light
relay.
WIRING DIAGRAM
CAUTION / NOTICE / HINT
NOTICE:
Inspect the fuses for circuits related to this ...
 Light Control Switch Circuit
DESCRIPTION
The main body ECU (driver side junction block assembly) receives the following
switch information:
Light control switch position off, tail, head or AUTO
Dimmer switch positi ...
Other materials about Toyota Venza:
Dinghy towing
Your vehicle is not designed to be dinghy towed (with four wheels on the ground)
behind a motor home.
NOTICE
- To avoid serious damage to your vehicle
Do not tow your vehicle with four wheels on the ground.
- To prevent causing serious dama ...
Removal
REMOVAL
CAUTION / NOTICE / HINT
HINT:
Use the same procedure for the RH side and LH side.
The procedure listed below is for the LH side.
PROCEDURE
1. DISCONNECT CABLE FROM NEGATIVE BATTERY TERMINAL
CAUTION:
Wait at least 90 seconds aft ...
Reassembly
REASSEMBLY
PROCEDURE
1. INSTALL NO. 14 ROOF SILENCER PAD
(a) Align the markings on the roof headlining assembly with the No. 14 roof silencer
pad and install the silencer pad using hot-melt glue as shown in the illustration.
2. INSTALL NO. 1 ROOF WIRE ...
0.1514

